
iMapBuilder - Interactive Map Software
![]()
![]()
Help Topics:
Getting Started
- Installation guide
- Interface Introduction
- Create an interactive map
- Map properties
- Styles and color theme
- Tooltip
Draw on map
- Add marker
- Draw line
- Draw route
- Add label
- Add clickable area
- Insert image or add logo
- Edit multiple objects
Software Features
- Area color and link settings
- Create heat map
- Map with legend
- Category filter for markers
- Highlight and group areas
- Import city to an interactive map
- Pan and zoom function
- Default zoom level and center point
- Batch edit region settings
Publish to the web
Embed map into blog or CMS
Plot latitude and longitude
Example of use
- Create population density heat map
- Clickable image map
- Create a drill down map
- Create World map
- Create U.S. map
License and registration
Create U.S. Map
Making an interactive U.S. map is simple and easy, just follow the steps below and you will be making it in no time.
- Click create in the create new map project panel.
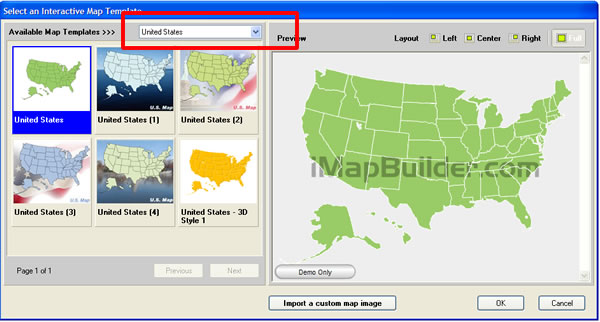
- Select a map on the left under available maps. Or select the category United States from the dropdown box, several maps with different styles show.
-
You can also find interactive maps of other countries in the software.