Create a heat map
You can create a heat map to visualize the location based data by highlighting distributions in an area.
- Click
 . The Heat Map dialog is now displayed. Please check the "Enable Heat Map Function" to show heat map function.

Displaying the Heat Map Settings Panel
- Choose Heat Map Type-
A. Continuous Color
The heat map is colored by continuous colors. It is not possible to add any other colors into the heat map using this type.
You can select the Start Color and End Color of the heat map. Start Color will be shown in the region which is assigned with lowest value while End Color will be shown in the region which is assigned with highest value.
B. Discrete Range Color
Any colors can be used in the heat map using this type.
- Enter the range limits. 1 single range number add 1 time. For example, enter -10 and click [add], the range will be appeared below. Then enter 10 and click [add], the second range will be appeared and so on.
- Choose Color for each range limits. Click on the color square next to the range column, then a color picker will pop up behind this setting panel. Select your desire color.
- Add numerical data in Heat Value column. Make sure to type integer only.
Click Update to save the settings.
Note: A heat value can be the population, price for real estate, or any other data. For example, you can input 127288416 to indicate Japan population and 67386383 for Thailand population.

Displaying the Discrete Range Color Settings

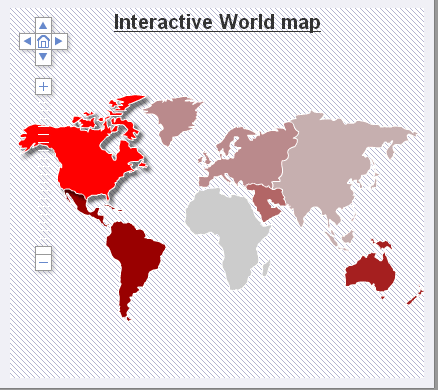
Displaying the Heat Map Data
- Heat maps with different heat map type are now created. You can preview it instantly in iMapBuilder
online editing panel.

Displaying the heat map using Discrete Range Color Setting
Displaying the heat map using Continuous Color Setting
- You can also import bulk data to the map by using compatible format. Please refer to the page Import and Export Data for further information about import and export data.